You know those annoying people always getting their kids or friends to line up and smile – I am one of them – I am a proud photo nerd. But since no one is going to confuse my photography skills with those of Ansel Adams, I’ve worked hard to fine tune my other photographic skills – organizing and sharing. Smartphones and social networks have made photo sharing so easy that lots of folks are forgetting that the best photos are the ones from many years ago when your kid was born or you friend got married. Even if Instagram was around back then, it would be too darn hard to find those old photos. And, for those of us taking photos before the iPhone era, it’s the older photos that we often want to see the most. This is where my three rules for organizing photos come in.
Three rules for organizing photos
- Don’t get locked into a single tool – Apps like Apple’s iPhoto is seductively easy to get started with but like the words to Hotel California, “you can check out any time you like but you can never leave.” Photo editing and organizing tools are constantly evolving. The one you start with isn’t likely to be the best for you a few years down the road. Whichever tool you pick, make sure it lets you store your photos in your own folders – then you can change tools any time you like.
- Keep lots of copies of your photos – Computers crash. Photo sites go out of business. It used to called “backing up”. Now they call it syncing with the cloud. Every photo you want to save should be synced on every computer, phone and tablet you own.
- Enjoy your photos – Most people never look at a photo after it is a few days old. Pictures were meant to be looked at, not buried so deeply that you don’t bother trying to find them anymore. Make them easy to access everywhere – computers, phones, TVs, screen savers, etc.
With the right tools, a little bit of organization and a few hours here and there, I have found it’s pretty easy to enjoy all the photos I’ve taken over the last 20 years.
Step #1 – Pick your tools.
My personal favorites are:
- Picasa from Google – this is a free app that runs on both the Mac and Windows. It’s incredibly fast. It lets you organize the photos in your own folders. And, its photo editing features are more than enough for casual users. Best of all, since the photos are stored in your own folders, you can change to another editing or organizing tool any time you like.
- Dropbox – this app synchronizes photo (and other) files across all your devices – it’s like magic. Put a file on your computer somewhere and it’s instantly copied to all your other computers, Mac or Windows. My wife’s computer also has Dropbox syncing all our photos so she can edit and organize them from anywhere as easily as I can from my own computer. And, as a bonus, it automatically keeps a copy “in the cloud” so you can retrieve it from any web browser anywhere. If you don’t like Dropbox, Box.net and Google Drive are great alternatives. All these apps offer some storage for free but I pay about $100 a year to keep everything in sync.
- Honorable mention: Easy Thumbnail – you don’t really need it but this free little tool will super-compress your photos and make your Dropbox storage go a long, long way. I make “thumbnails” that are 2000 pixels wide (more than enough for printing 4X6 photos) and regularly get 5-10X savings on the size of my photo files.
Step #2 – Set up folders for organizing your photo files
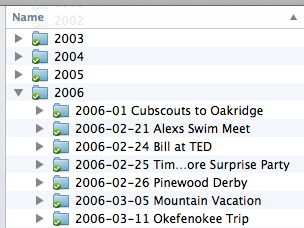
In any location that Dropbox will sync, create a folder for each year (e.g. “2013”) and then create a subfolder for each event or photo set in that year. The key is to name the subfolder so that it will always sort it in chronological order – for example, “2012-11-31 Kids Halloween Costumes”. Dates that start with the year are easy for any photo organizing tool to search and sort. Simple and clear descriptions make it easy for you to find the set of photos you are looking for.
Step #3 – Make it easy to share
Pictures were meant to be shared. My approach is to create a folder called Screen Saver for all my most recent photos.
- Copy photos off of your DSLR or pocket camera memory card into Screen Saver
- Use the Andriod or iPhone Dropbox app to sync your Smartphone’s camera roll directly into Screen Saver
- Any old, paper-based photos you can scan in can get dropped into Screen Saver
Then, to really give your photos a chance to be seen…
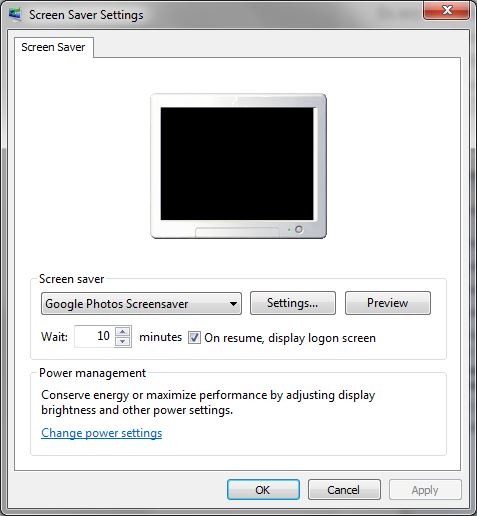
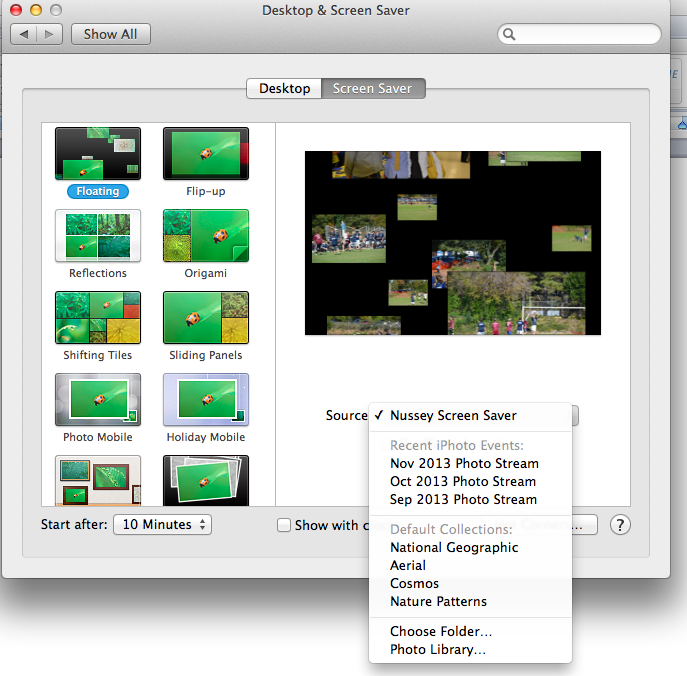
- Point your Windows and Mac screen savers at the Screen Saver folder


- (I recommend downloading Google’s great Windows photo screen saver)
- If you have a TV device like AppleTV or Roku, point the device’s screen saver feature at your Screen Saver folder – this way you’ll see your most recent photos if you forget to turn off your TV after watching Breaking Bad on Netflix
- I share my Screen Saver folder with my mother’s Dropbox on her computer and she gets a real time stream of grandkid photos from 500 miles away
- I even set up an old Mac Mini and a small computer screen in my family room that scrolls through our recent photos. This creates a magical effect when guests or friends stop by because it’s always running.
Power user tip: Dropbox has a cool feature that lets you share a URL with friends that links back to a copy of a particular folder. So if you have an event folder like “\dropbox\2012\2012-12-01 Kids basketball game”, you can share that link with the other parents and they can see all those photos and download the ones they like to keep copies of.
Bringing it all together
The last part takes a little bit of work from time to time but, it’s been worth every minute when I want to go and find that first birthday party picture or our share the highlights of our summer vacation with a friend.
First, every few weeks, move your photo files out of the Screen Saver folder into subfolders for each event or photo set (Step #2). This keeps only the most recent photos in your screen savers while simultaneously building the archive that makes it easy to find old photos in seconds.
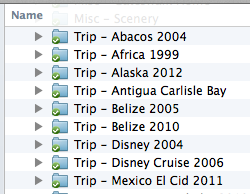 Second, create another high-level folder with a name like “Albums” and then fill it with subfolders for vacations, family pictures, holidays, etc. Copy in a dozen or two of the best photos for each subfolder. This makes it incredibly easy to see your favorite memories with just a few clicks. I also make “Albums” my default photo location when I sync my iPhone and iPad with iTunes so all these photos are just a swipe away when a friend wants to see some pictures of my family.
It’s pretty easy to take photos these days. And, it’s never been easier to share them in real time over social networks and photo apps. But, if you really want to enjoy your photos for years and years and if you want to share memories, not just snapshots, it might be worth two or three hours every month to organize your photos. For me, it’s been worth every minute.

Thanks Bill – very handy tips. I have struggled to find the right tools to get started as time is always a constraint – so thanks for sharing your tips to get me started.
Thanks Bill, …with every click, or every scroll down, I find something useful and in synch with my needs and interests. Very thankful you take the time to share in such a well laid out way!